 GitKraken Desktop
 GitLens for IDEs
  GitKraken CLI
 GitKraken MCP
 GitKraken Insights
 Git Integration for Jira
 Supercharge Your Dev Team
  Secure Your Dev Team

This article was written by a guest author.
Using GitLab CI with GitKraken
In today’s world of software development, one of the most emphasized practices is CI, or Continuous Integration.
Continuous Integration is the first step of the CI/CD pipeline and acts as an enabler for the whole DevOps mindset and methodology. CI is the foundation of modern software development. Given the fact that this is the first stage of a proper DevOps setup, it’s crucial that it must be done correctly.
Consider that you have an application with its code in a GitLab repository. Developers push code changes every day, even multiple times a day. With each change submitted to the application’s code base, a new build must be created and tested.
One of the simplest Continuous Integration flows involving GitLab CI consists of the following stages:
- Push changes to GitLab.
- Build the application – process executed by the GitLab runner which consists of packaging the source code into standalone software artifact (we will provide an example of this later in the article with a Docker image).
- Test the application – process executed by the GitLab runner with the aim of validating our code changes—using a service or a tool pylint in our case—before deploying our application.
Defining GitLab CI/CD
What we want to achieve is a stable application with zero bugs, while respecting guidelines and code compliance standards.
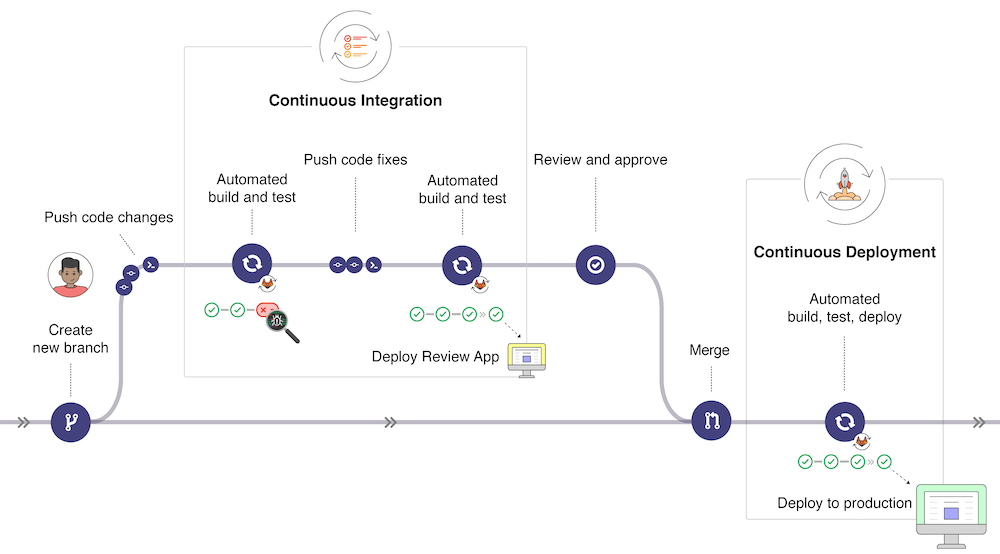
Basically, we want to continuously build, test, and deploy iterative code changes. Further down we can observe a high level diagram of the whole GitLab CI/CD process.
Fun fact: GitLab itself is an example of a project that uses Continuous Integration as a software development method #ouroboros.
Going further down the line we have Continuous Delivery, which means that not only our application is built and tested each time a code change has been pushed to the repository, but the application must be also deployed continuously. However, with Continuous Delivery, we trigger the deployments manually, as opposed to Continuous Deployment which will fire automatically.
Our goal is to make deployment predictable and stable, whether of a large-scale distributed system or a complex production environment. Continuous Deployment is the next step past Continuous Delivery. Human intervention is not required to deploy the tested changes.
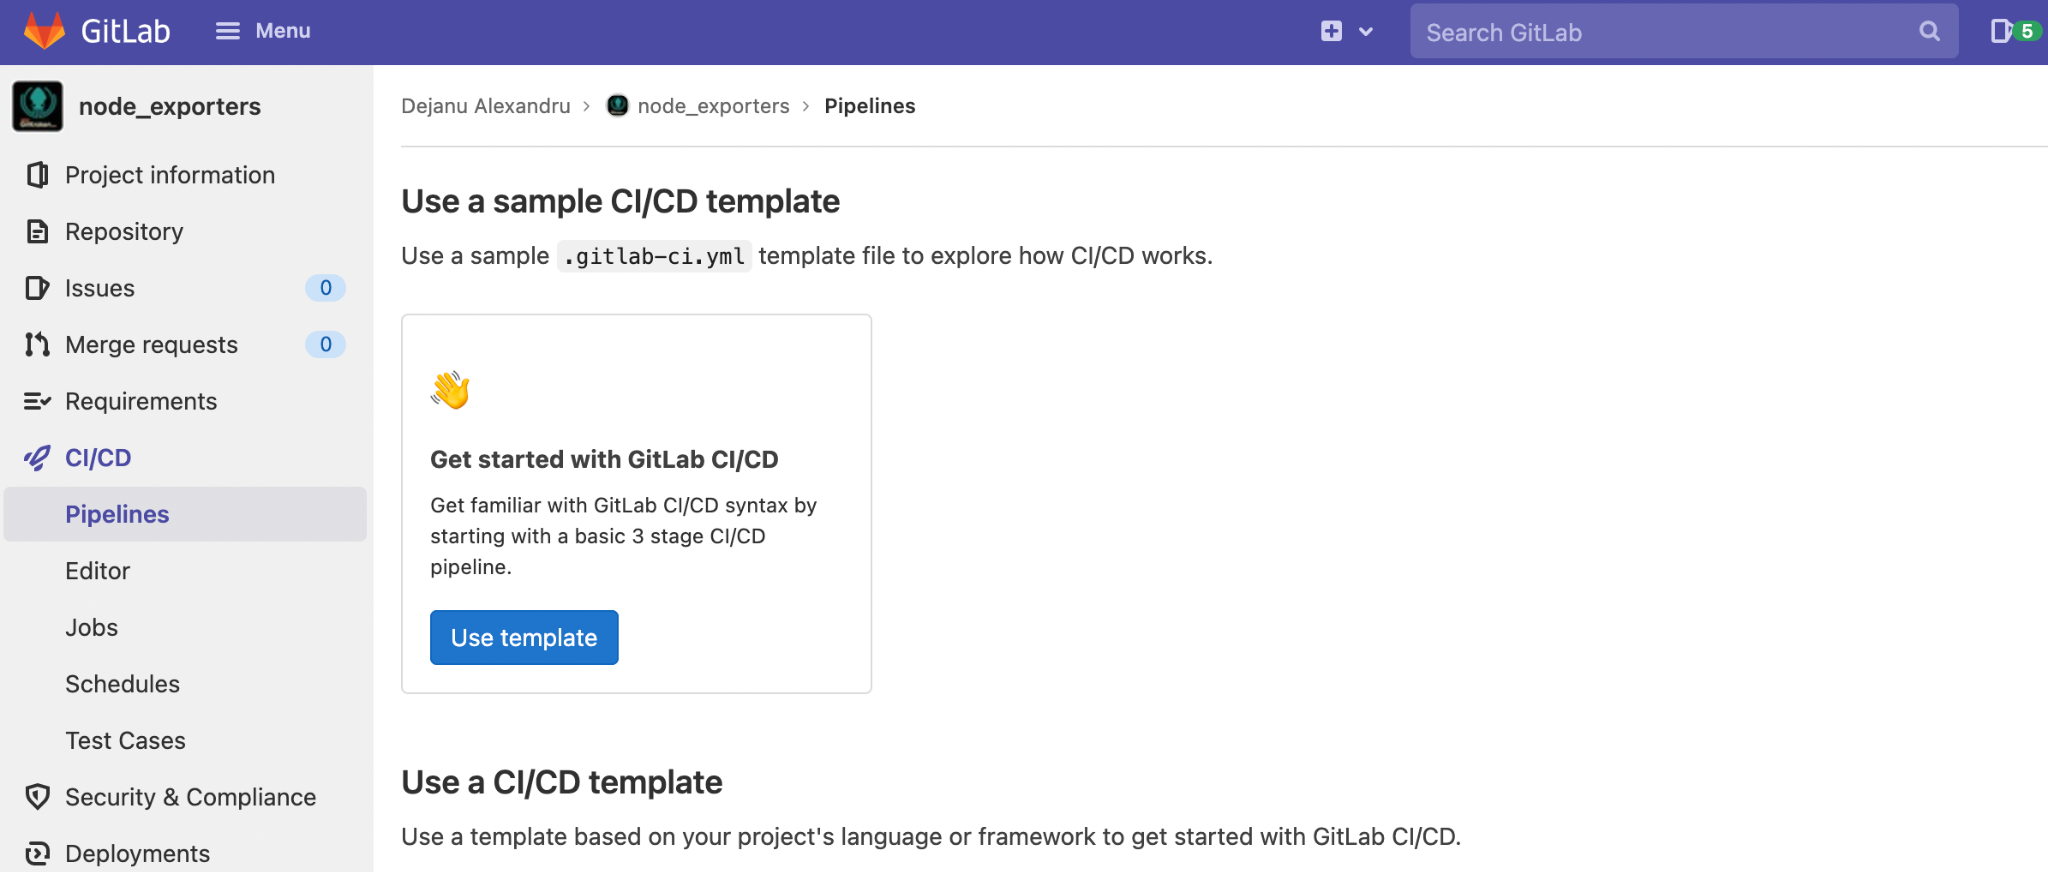
How to Implement GitLab CI
From the tooling perspective, we need a GitLab repo and the GitKraken Git GUI to demonstrate a proper GitLab CI/CD flow.
Spoiler alert: implementing a CI/CD workflow is far easier with GitKraken’s seamless integrations and visual commit graph. What are you waiting for? ⬇️
GitLab CI yml File
One of the main components of GitLab Continuous Integration is the .gitlab-ci.yml which resides in the root of the repository and contains the GitLab CI/CD configuration.
First, let’s talk about the structure of the Git repository. We have our application, in this case, a Prometheus exporter written in Python – basically, an application that exposes an API.
The layout of our repository comprises of:
- app.py + requirements.txt (our app and the dependencies)
- Dockerfile – file that contains all the commands needed to package our app as a Docker image
- curl_test.sh – some basic tests for our endpoint
- .gitignore – to exclude certain files from git tracking
- .gitlab-ci.yml – which describes our pipeline flow
As we mentioned before, we need to expand a little bit on the build process. At the core of our build process resides the Dockerfile which provides the means (commands) of packaging our application as a Docker Image. The build uses a Dockerfile and a “context”. The context is the set of files in the directory in which the image is built; basically, Docker will build images automatically by reading the instructions from the Dockerfile.
GitLabs CI/CD core components:
- pipeline: top-level component of Continuous Integration, Delivery, and Deployment.
- runner: GitLab uses runners on different servers to actually execute the jobs in a pipeline; GitLab provides runners to use, but you can also spin up your own servers as runners.
- job: the basic configuration component which defines what to do (e.g. compile or test code).
- stage: define when to run the jobs.
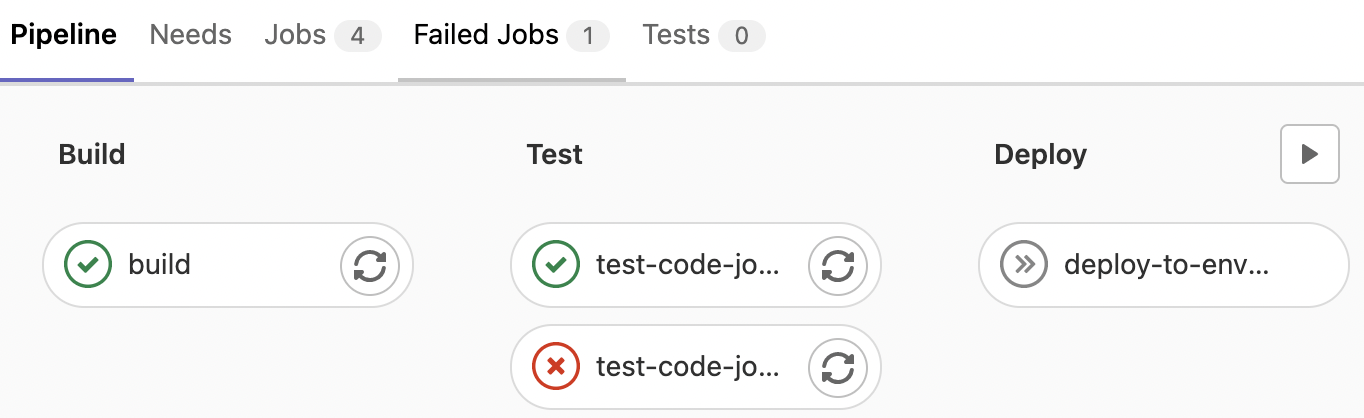
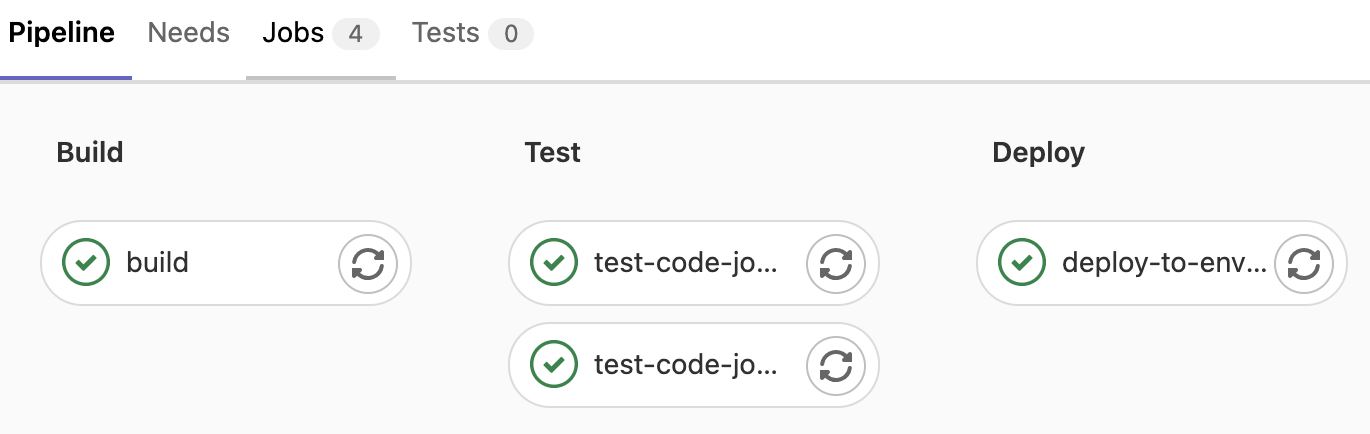
To briefly summarize, jobs are being executed by runners, and stages provide a way to organize jobs (e.g. if multiple jobs are in the same stage, they are executed in parallel). If all jobs in one stage succeed, the pipeline moves on to the next stage; otherwise, if one job fails, the whole pipeline will fail.
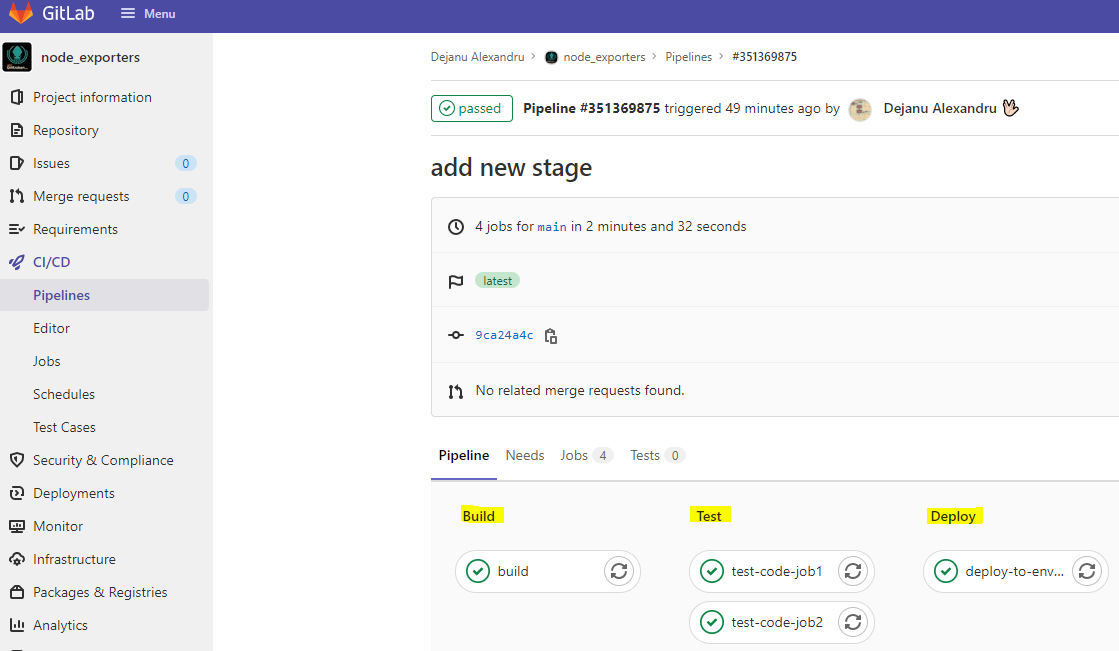
A concrete example is illustrated below, where we have three stages (build, test, deploy). In the test level stage, there are two test jobs that are executed in parallel, and if one of them fails, the pipeline will fail and the deploy stage will not be executed.
Trigger GitLab CI from GitKraken
The gitlab-ci.yml file describes our workflow in terms of jobs that constitute a pipeline, the latter being the top-level component of GitLab CI/CD.
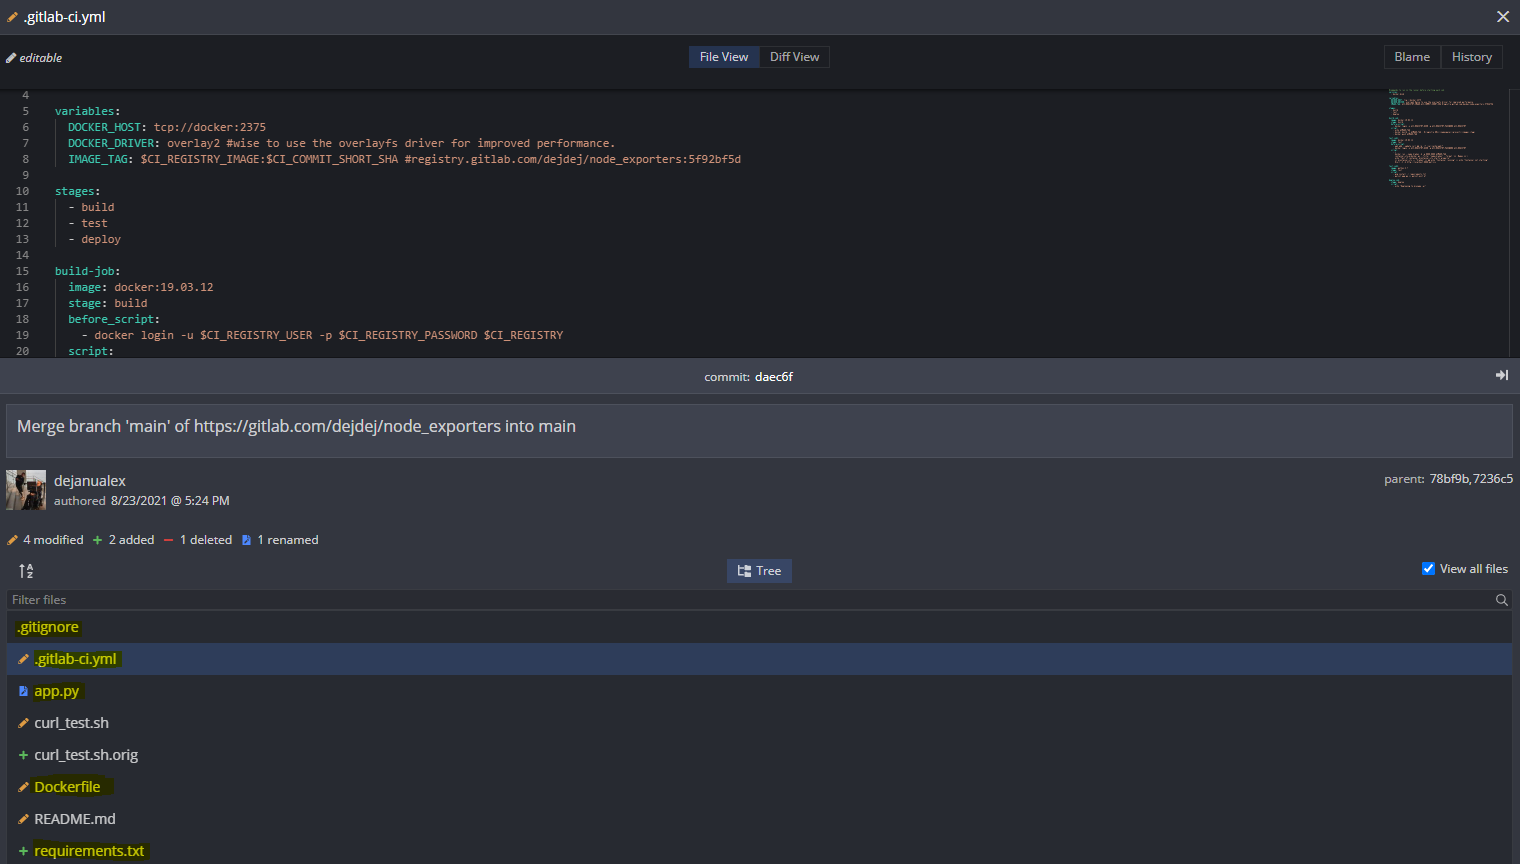
When we add a .gitlab-ci.yml file to our repository in the GitKraken Git GUI, GitLab automatically detects it and an application called GitLab Runner runs the steps defined in the stages.
Below we can see the .gitlab-ci.yml file displayed in GitKraken’s in-app text editor.
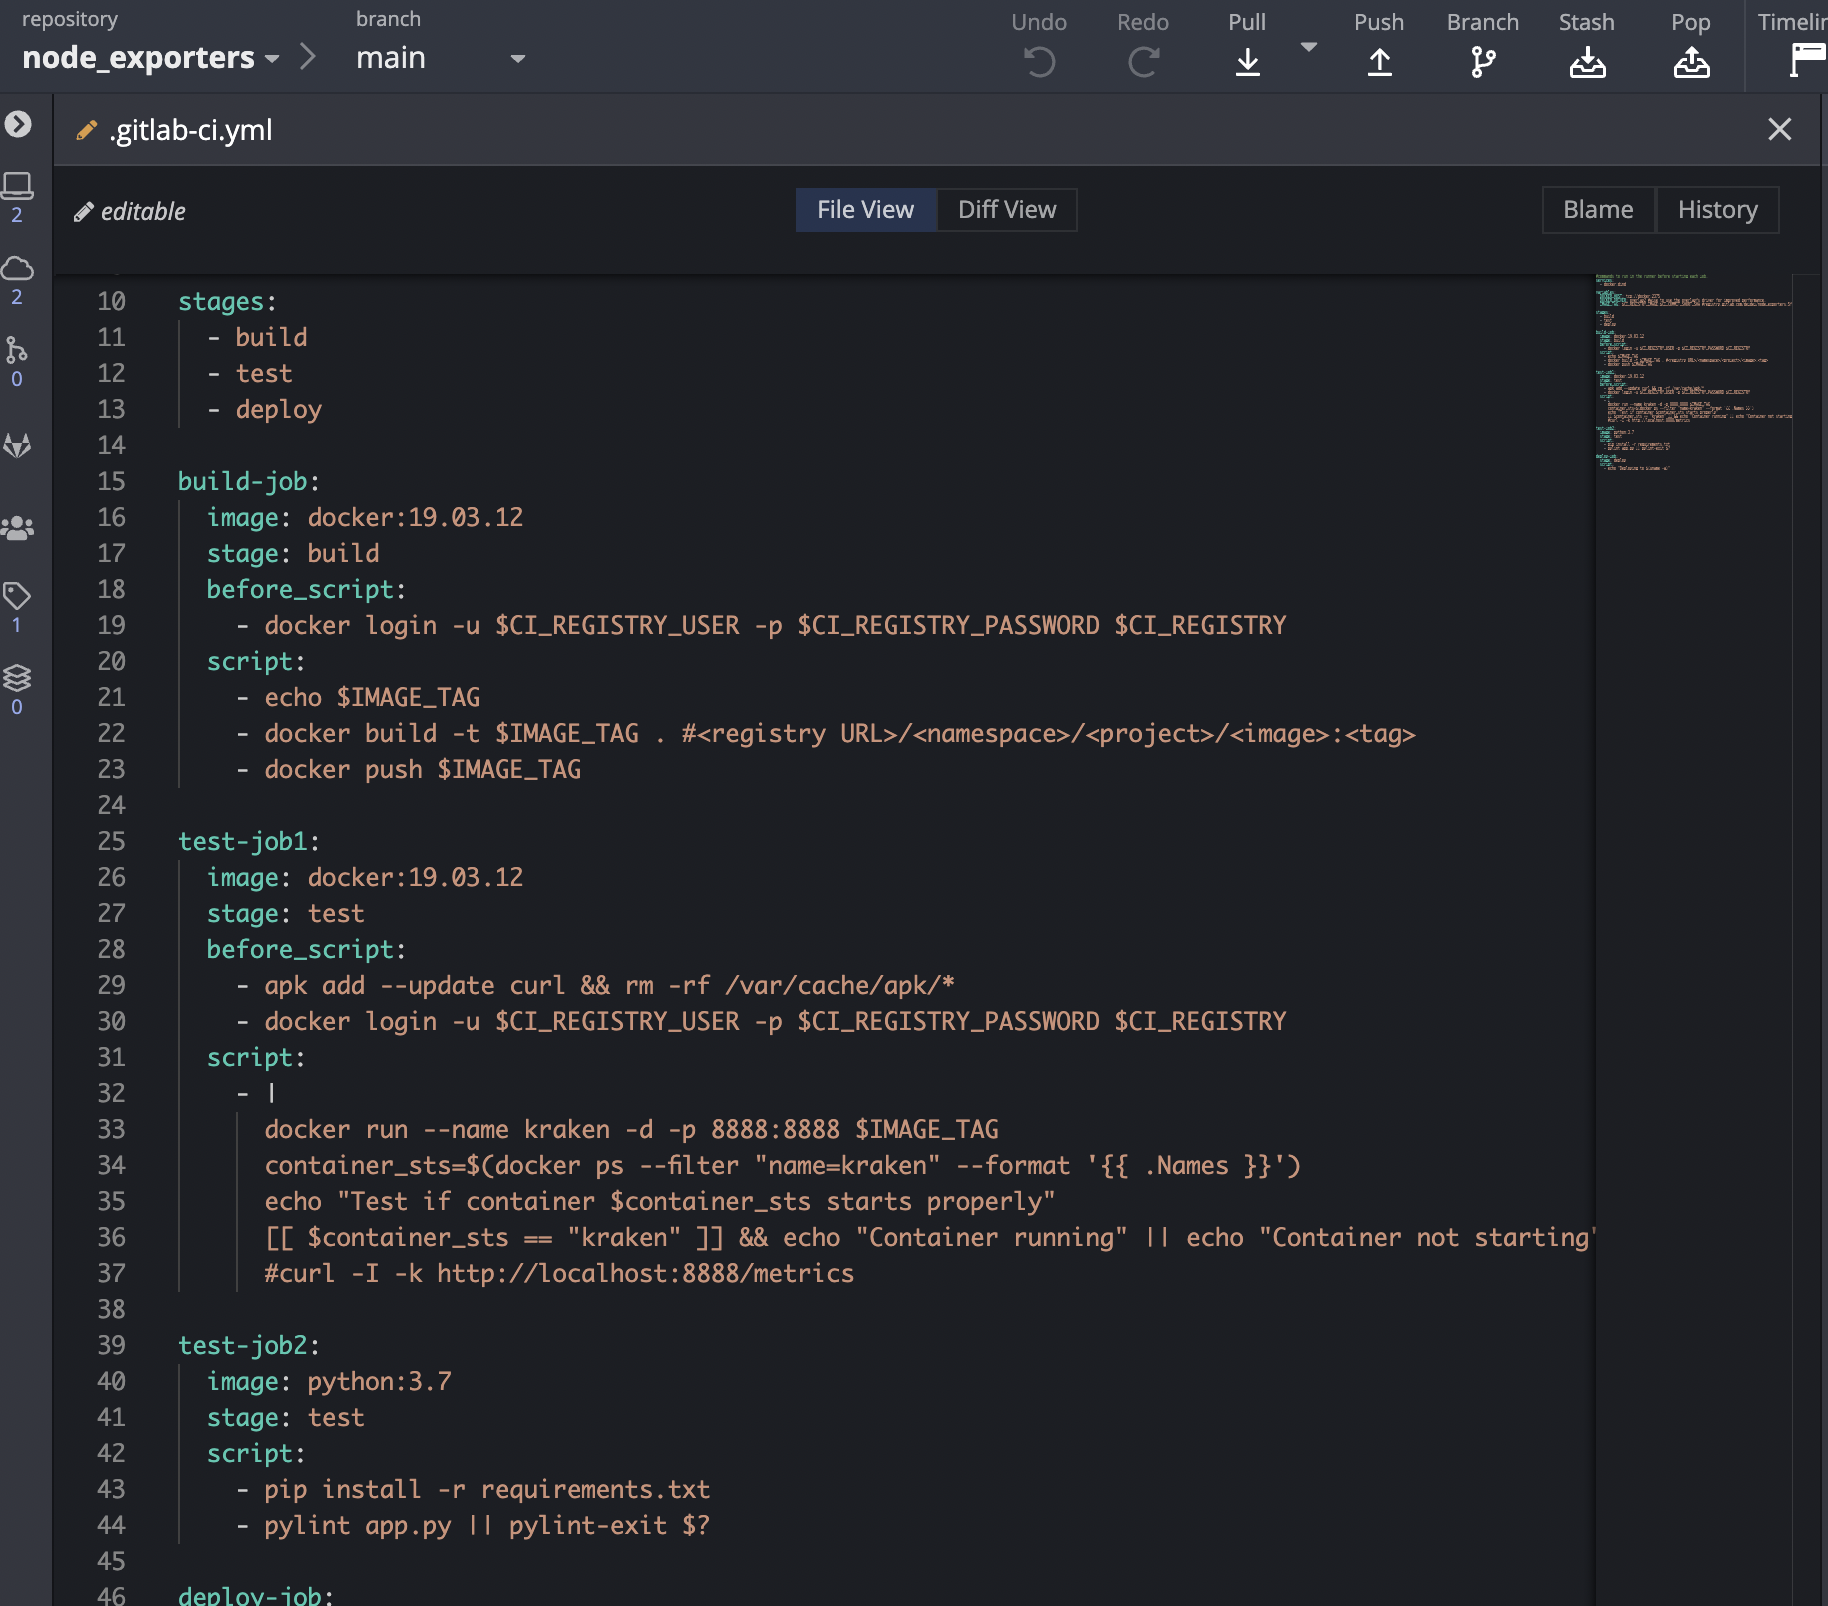
From a high-level perspective, our pipeline has four main jobs which are executed by the runners, two of which are executed in parallel: test-code-job1 and test-code-job2.
Our goal is to trigger the GitLab CI process; meaning build/package, test and finally, deploy our application straight from GitKraken.
Visualizing the CI/CD workflow is much more intuitive with a tool like GitKraken, so your entire team can contribute, no matter their skill level.
In order to have a better view of our workflow, we’re going to use tags, which are useful for marking certain deployments and releases for later reference.
GitTip: Learn more about how to use tags in GitKraken, including how to Git push a tag and how to checkout a Git tag.
Tag creation and annotation are done directly from GitKraken, so there’s no need to use commands like git tag -a v1.0 -m 'Version X.Y'.
Git tags give the ability to flag specific points in history—commits—as being important and “mark” them as release versions.

After we push our changes, we can see that the build process has been triggered and as a result, under the repository Container Registry tab, we can see our artifact: our Docker images with the desired tag. Within GitLab CI, every project can have its own Container Registry space to store images.
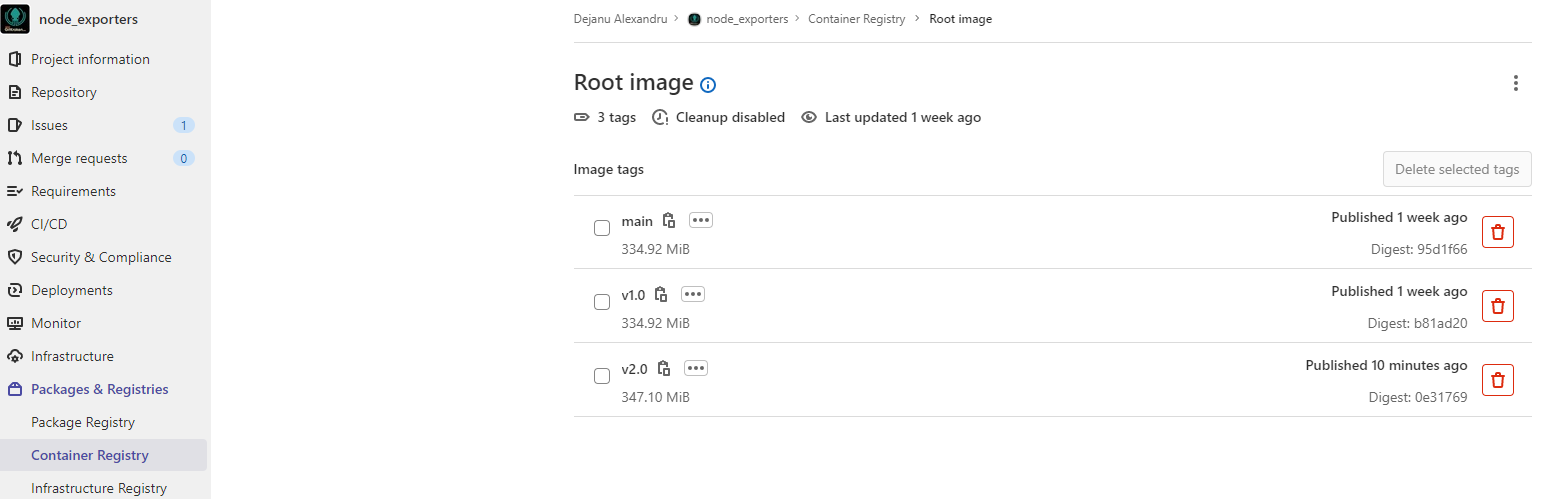
In accordance with the aforementioned concepts, we can see how easily it’s to publish a new code change (bump to version 9.0) with the right tools 💻 with respect to a CI/CD best practice.
Are you ready to use GitLab CI with GitKraken?
As might be expected, there are multiple flavors/variations concerning a GitLab CI workflow, but once you have a stable and clean workflow, you will be able to easily expand upon it later.
GitLab empowers us to establish and develop a healthy CI/CD practice, and the GitKraken Git GUI brings an added value to the whole ecosystem by providing flexibility and simplifying the whole process, making it easier to manage the whole pipeline with better visibility.
Getting started with continuous integration can seem overwhelming, but with the help of GitKraken, you and your team will get mobilized for a CI/CD workflow in no time.