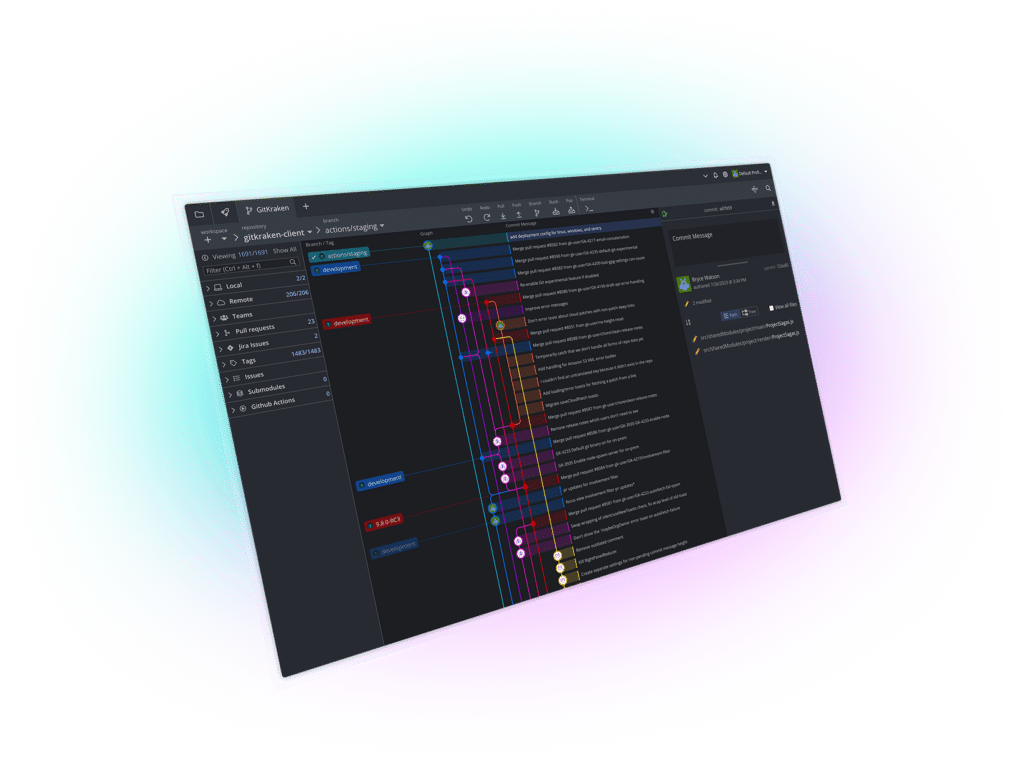
Git allows you to take snapshots of a repository over time. Each of those snapshots is called a Git commit. But how does Git know what information we want to commit?
This is where Git add comes in. Git add is a command that allows you to stage individual files, or all files in the project directory at once, preparing them to be staged. Git add is one of the most important and fundamental commands in Git, and there are many ways to use it. This article will cover how Git add works and some of the optional ways to employ the command.
- Add Git Index
- Git Add All
- Git Add Interactive
- Undo Git Add
- Git Add in the Command Line
- Git Add in GitKraken Desktop
“@GitKraken is easily one of the best tools I discovered this year that increased my efficiency as a software developer and author noticeably.” – @hflickster
Add Git Index
Git add is the mechanism for staging files that are on their way to being committed. You might be asking: “What is Git adding the file to?” This is a good question. Inside every Git repo, there is a file called .git. This file is created when a project is created with Git init. Git uses this file to keep track of all the changes and work done in a repository. One of the files the .git folder contains is called “index.”
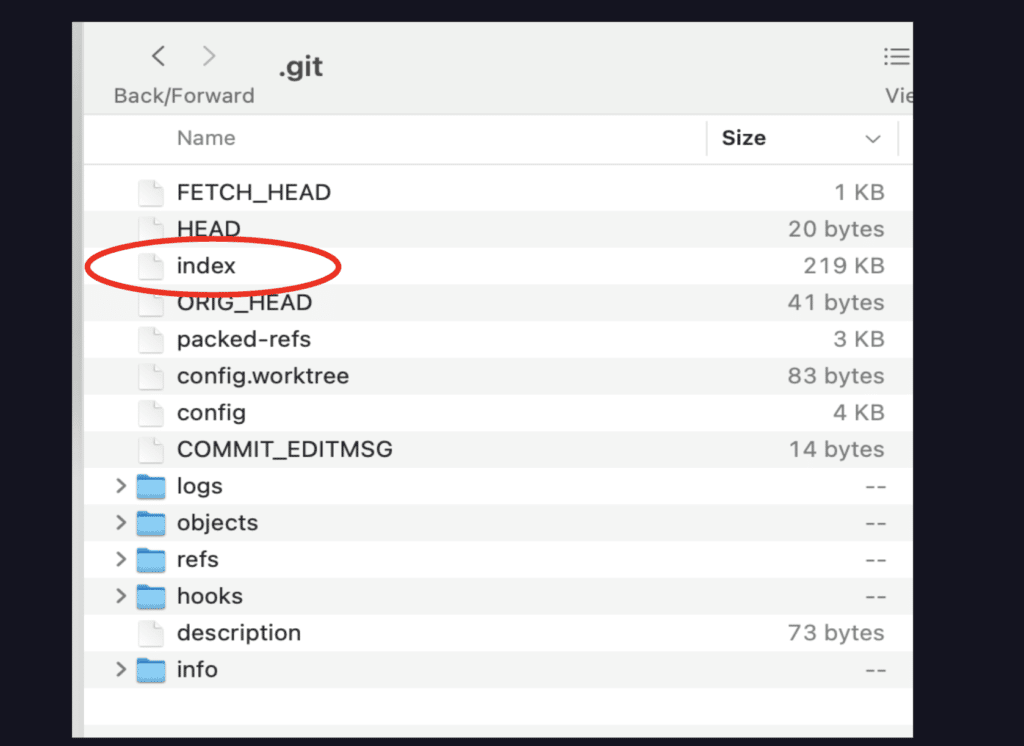
When you run a Git add, Git compresses the modified and saved files in your working directory into Binary Large Objects, also known as blobs, and adds them to the index file. The index file here acts as a staging area for the individual blobs. The index can be modified as much as you want until you’re ready to make a permanent record of the state of your project by executing a Git commit.
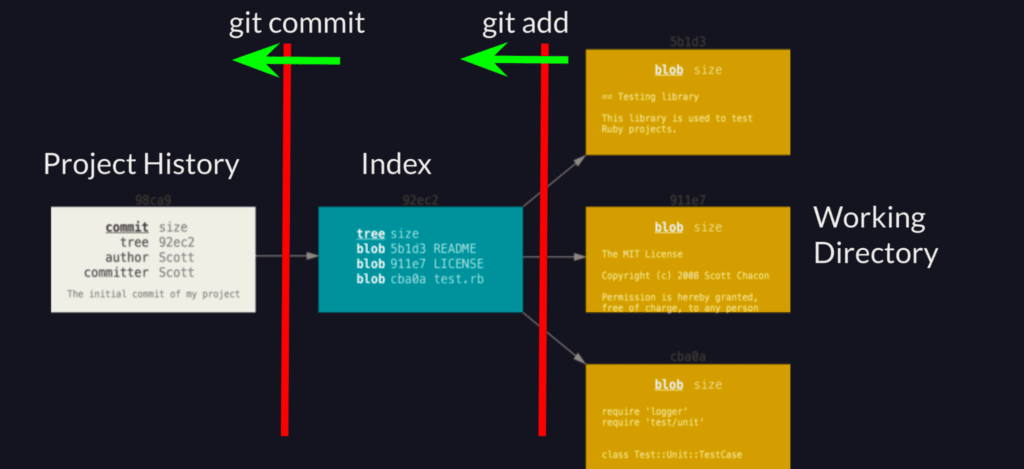
You can actually open the index, but you won’t be able to read the vast majority of what is stored there, as it’s in a compressed form with only the file names remaining discernible.
Git Add All
When adding files to the index in preparation for committing those changes, you can choose to stage each file one at a time, or you can tell Git to stage all the files in the working directory that have been modified and saved. There are actually a couple different ways you can add all files at once.
To commit all files, you can use option --all, or simply -A for short. The command would then be structured:git add -A
Alternatively, you can specify the current directory, and therefore all sub directories, by using the special character ., called the “dot.” To stage all files with this method, use the following command:git add .
Note: while it is convenient to add all files to the index at once, be cautious about overusing either of these methods. If you aren’t careful, you can accidentally add, commit, and Git push things that aren’t ready or were never intended to be committed to the repo.
Git Add Interactive
Git can be difficult to learn on the command line, so the creators of Git added an interactive mode, which you can invoke with -i or --interactive.
By running Git add in interactive mode, Git will show you a menu of possible options and let you make decisions per file. This is a very safe way to work and will give you fine grain control over what goes in or comes out of the index at any given time. To invoke interactive mode, use the command:
git add -i
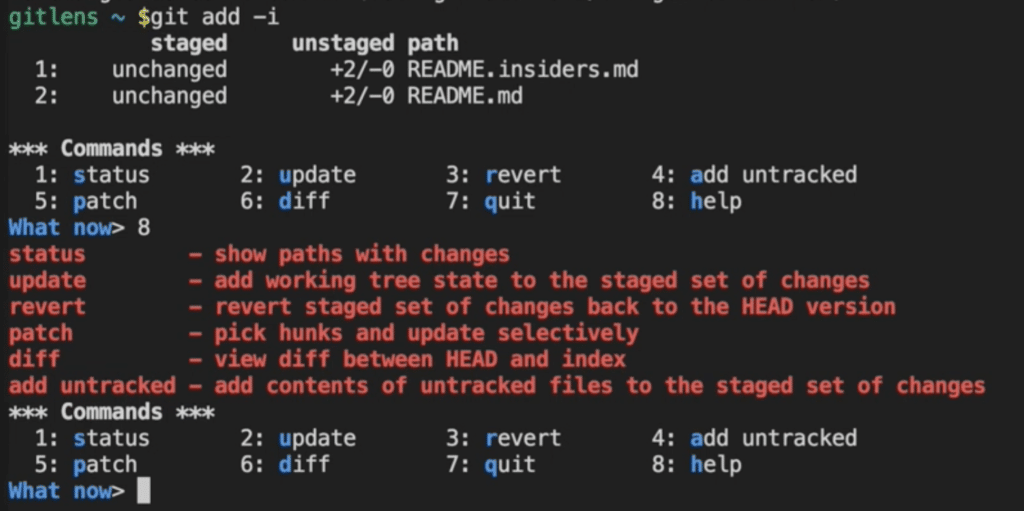
The options for Git add interactive mode include:
- status – show paths with changes
- update – add working tree state to the staged set of changes
- revert – revert staged set of changes back to the HEAD version
- add untracked – add contents of untracked files to the staged set of changes
- patch – pick hunks and update selectively
- diff – view diff between HEAD and index
- quit – exits Git add interactive mode
- help – prints the help menu to the screen
Undo Git Add
You have full control over what gets staged in your index file. This means you can also remove things after they are added to the index for staging, effectively undoing the Git add. There are a couple of paths to removing files from the index: removing individual files one at a time or removing everything from the index all at once.
To remove a single staged file from index, use the command:git rm --cached <filename>
Replace <filename> with the name of the file you want to remove from staging.
To remove all the files staged in the index at the same time, use the command:git reset HEAD -- <directory-name>
Replace <directory-name> with the name of the directory for your repository.
If you want to remove all files from staging in the directory you’re working in, you can use the shortcut . to refer to the current directory.
git reset HEAD – .
GitKraken Client makes it easy to see what is going on in your repository and keep on top of changes, no matter how many files you add to the index!
How to Git Add in the Command Line
In the command line, you can Git add your modified and saved files one at a time or all at once.
To perform a Git add against a single file, use the command:git add <filename>
Replace <filename> with the name of the file you want to add.
It’s always a good idea to run a Git status when you’re working in the CLI to make sure actions are executed as expected.
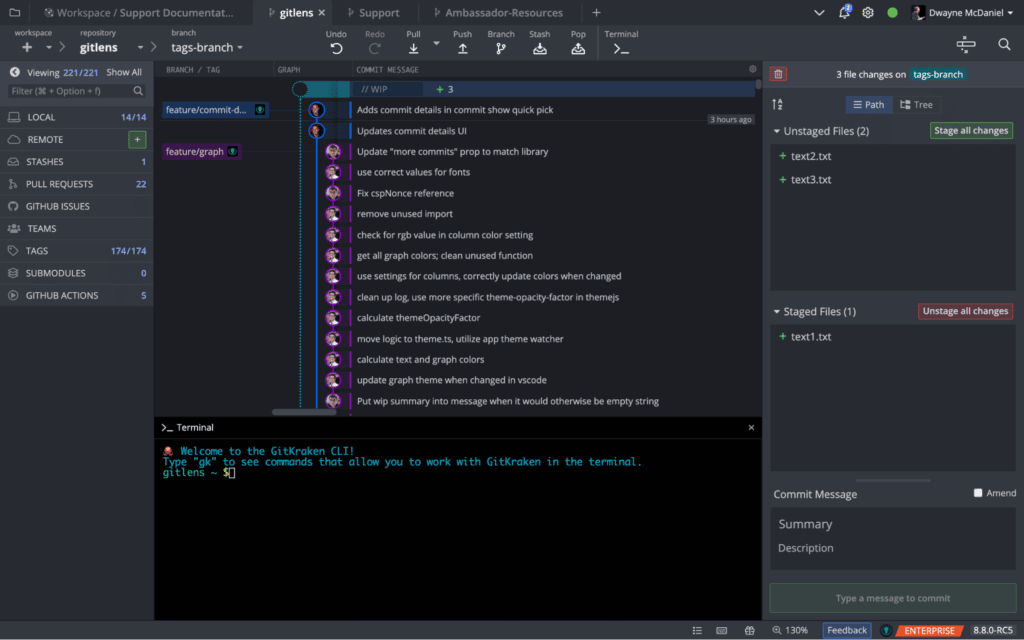
Psst: when you use the terminal in GitKraken Client, you won’t need to run additional commands to ensure actions were executed as expected. The GitKraken graph will automatically update at the same time, as shown above, so you can verify which actions were performed and how your project history was updated.
You can also add more than one file at a time just typing each file name after Git add.git add <filename1> <filename2> <filenameN>
Replace the numbered <filename> entries above with the names of the file you want to add.
You can also add all modified files in the working directory at once with the A option:
git add -A
How to Git Add with GitKraken Desktop
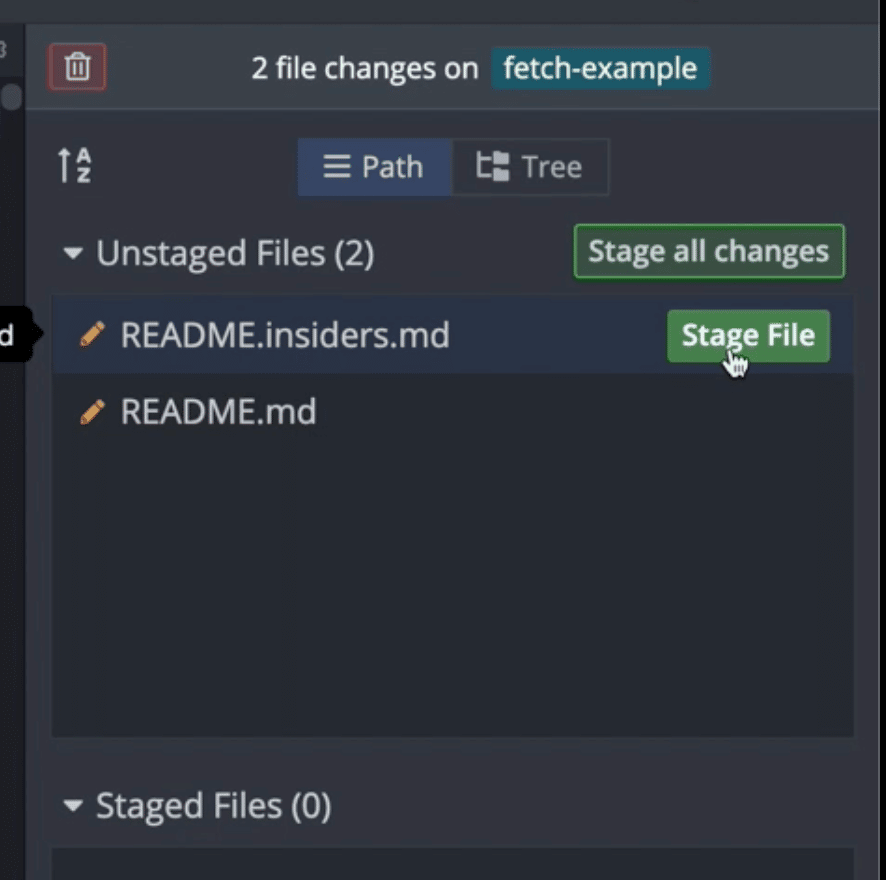
Using GitKraken Desktop, it’s extremely easy to add files to the index. GitKraken Desktop will always show you the state of your modified files without running any commands or clicking on any options. The status is available in the Commit Panel, located on the right side of the application’s central UI.
To add an individual file to the staging area, also known as the index, use the Stage File button that will appear when you hover over the file name in the Commit Panel.
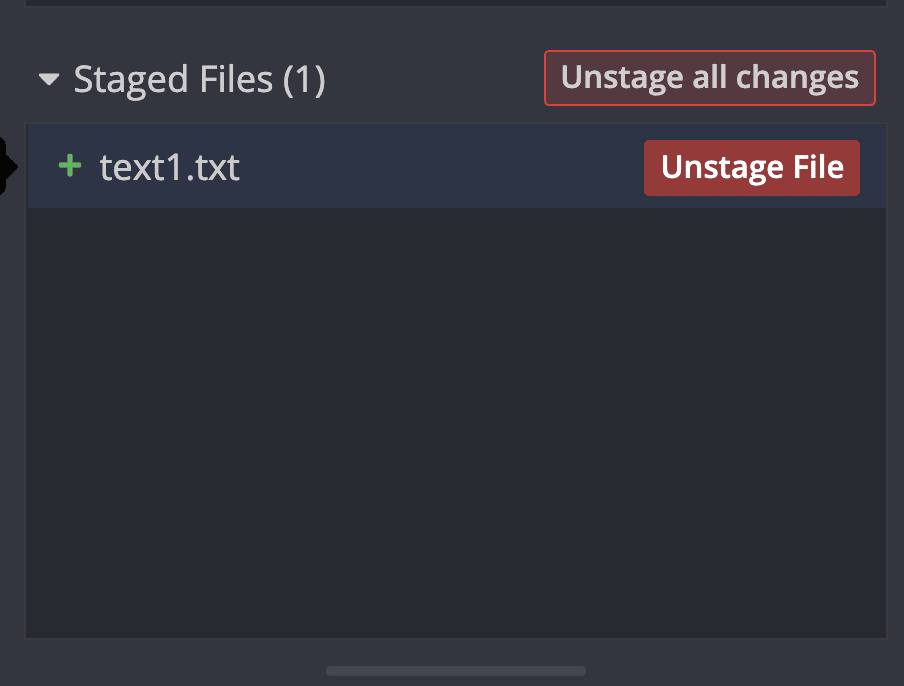
You can even unstage files by hovering over the file names in the Stages Files section of the Commit Panel.
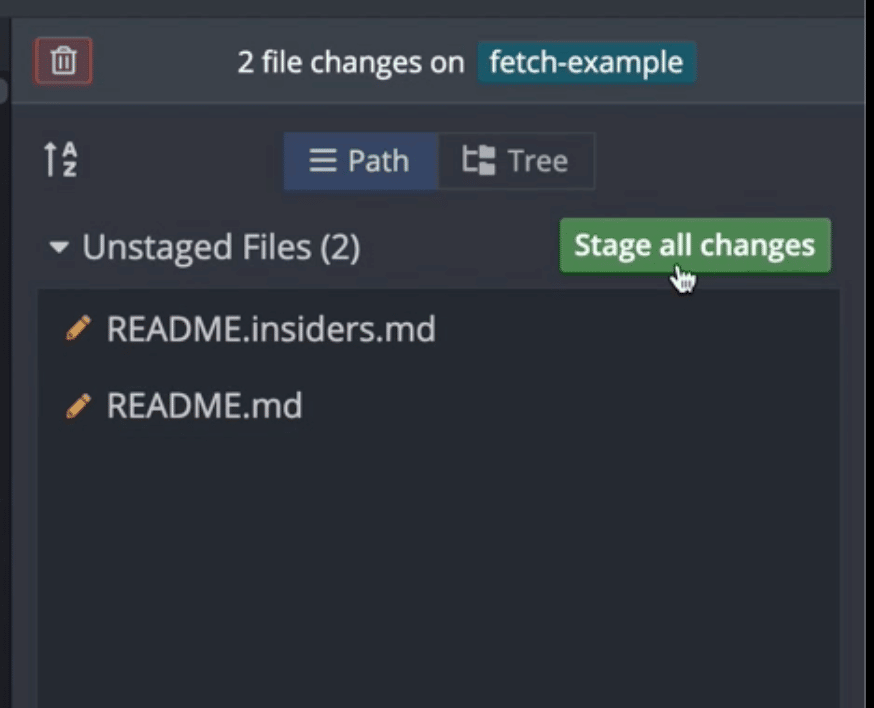
GitKraken Desktop also allows you to add all modified files at once with the Stage all changes button in the Commit Panel.
Add GitKraken Desktop to Your Workflow
GitKraken Desktop makes it extremely easy to see the stats of your project at any given time, saving you time and effort trying to remember what commands you need to run to view the files you modified.
GitKraken Desktop can help you take control of your repositories through better visualization of your commit history, no matter what stage you are at in the commit cycle. Download and start using GitKraken Desktop for free today to make sure you are making the most out of Git.
 GitKraken MCP
 GitKraken Insights
 Dev Team Automations
 AI & Security Controls


